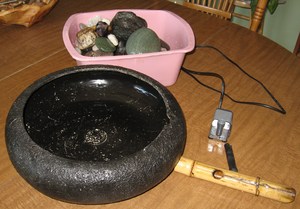
What’s more impressive than a soothing waterfall? A homemade waterfall made of materials currently gathering dust. Building a waterfall requires three basics: a tub, tubing and a pump. The rest of the materials are pure aesthetics, so you can use any mix of waterproof items to turn your clutter into an original tabletop waterfall design. Start your project by cleaning out the attic, basement, storage cabinets, garage or your entire house. Mobilize your treasure trove of discards to see what items work together. Bet you find enough raw materials to make more than one fountain of recyclable discards!
1. Dig up or purchase a piece of sheet rock to serve as the base/foundation of your homemade water fountain. Apply waterproof paint to all surfaces of the drywall after using tape to seal the edges so you start the project with a moisture-blocking foundation.
2. Test the fish tank pump that was relegated to the attic after the kids grew bored feeding those goldfish. Dust it off and plug it in to make sure it’s still running. Attach a length of plastic tubing to the pump (plastic tubing cracks over time so your original stash may not work). Fill a pot or bowl with water, submerge the pump and turn it on to check the water pressure and flow rate.
3. Pick a waterfall tub: A metal washtub, over-sized resin pot, terracotta flowerpots — that fish tank itself or any large glass receptacle that suits your fancy will work, as long as it holds water. Check the vessel for cracks, leaks and breaks. Clean, repair and paint it. Fasten it to the refinished drywall section to stabilize the unit using cement glue.
4. Create a center post to support the rubber tubing and hold it in place so water runs vertically up to the waterfall’s zenith. You can cement a section of PVC piping to the middle of the vessel if you plan to disguise the raw material with embellishments like shells, plastic flowers and other decorative touches or you can build the center post of rocks, plastic toy rings, blocks and other waterproofed trim that won’t be disguised.
5. Drop the pump into the tub of the waterfall once you’ve secured the center post. Use mono-filament – fishing line — to attach the plastic tubing to the support tower if you’re worried about the tubing shifting once the water starts flowing. Make certain there are no kinks or crimps along the length of the tubing as it can inadvertently choke off the water supply. Attach one end of tubing to the pump and secure the other end to the apex.
6. Get creative about disguising your waterfall post if it’s crafted of a raw construction material. Use your imagination and that gathering of found objects you unearthed to craft a quirky looking waterfall or wrap the post and tubing with a combination of plastic flowers and greenery that will withstand a constant flow of water. It’s your homage to recycling, so make it unique and fun.
Reference:
- www.calmingwaterfalls.com/how_to_build_an_indoor_waterfall/
- www.doityourself.com/stry/adding-an-indoor-waterfall-to-your-home
