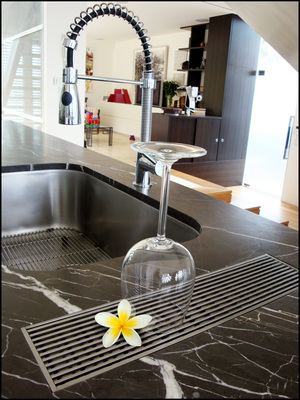
If your kitchen already has tiled countertops you will have to remove the existing tile and expose the wooden framework beneath. If you have installed new cabinets or are completely replacing your countertops you will need to lay a wooden framework on top before installing your tiles.
Cut a sheet of 1″ plywood to fit the countertop using a table saw. Make sure to cut out around the sink, stovetop and any other appliances which require top end access. You can lay the plywood in pieces if you are unable to handle the large wood in one piece you can cut the wood into smaller, more manageable chunks. Try to lay the wood across and seams in the cabinets so the surface ends up being level once the job is done. Use a level to measure the fit and use wooden shims to set things straight.
Attach the plywood to the cabinets with a combination of drywall screws and carpenter glue. Allow the wood to set for 24 hours before beginning the tile installation.
Purchase enough tiles to fit the square footage of the countertop making sure to factor in any edges or border pieces which will need to be cut. You will also need a pliers style tile cutter, a tile cutting circular saw blade, tile grout, waterproofing solution, a piece of wood 2 x 4 inches x 1.5 feet in length, a sponge, and plenty of clean disposable rags. Make sure you have waterproof work gloves as well.
Start at the front corner of one end of the counter. Starting in the most visible spot ensures full tiles and a perfect finish where you are most likely to see it. The cut to fit ends and uneven bits are therefore pushed to the rear of the counter where they are less conspicuous.
If you are using lipped tiles to fit and finish the front and side edges you will install these first. If you are using cut tiles or any other stone with no top edge overhang you will install these last.
Use a small plaster spatula to spread a bit of pre-mixed grout along the front and side edges of the plywood and use a toothed spatula to form grooves in the grout which will allow the tiles to adhere and dry more solidly. Use a thickness of about ‘ ‘ ‘” ”’ ”’½ inch to set a nice soft bed which will push up through the seams between tiles and create a full look. Start with the corner piece and place your edger tiles along the sides of the plywood until it is completely covered. Work on a small section at a time so the grout remains fresh and you have time to deal with cutting issues or anything else that may come up without worrying about a mess of unused grout drying out on the unfinished counter top. Press each tile into the side of the plywood so it sinks into and grabs the grout. As you get to the ends of the plywood edges you may have to cut your edger tiles to fit. Use your circular saw equipped with a masonry blade to do so.
With the edges completely tiled it is time to move to the countertop itself. At the most exposed front corner spread your grout to the same thickness you used on the edges, about ‘½ inch. Run a wide toothed trowel over the grout layer to create ridges. Lay your first tile in the front corner and work your way back toward the rear wall. Work in only 1 square foot or so of countertop at a time to keep things simple and under control. Once you have laid your first row or two, place the broad side of your 2 x 4 inch wood across the top of the tiles. Use a hammer and gently hit the wood downward from end to end so the tile settles into position in the grout. Some grout should work its way up through the tile as you do this.
Continue to lay tile and hammer it into position across the face of the countertop. As you reach the back row or the cutouts for the stovetop, sink, etc, you may have to cut your tiles to fit. If you are laying ceramic tile use your circular saw with masonry blade to cut the tiles into shape. Measure and mark them with a marker, then cut along the lines. If you are laying natural stone you may use your tile snips to cut the tiles into shape. Tile snips take a bit of getting used to and can cause whole stone tiles to shatter if done incorrectly.
Once all of the tile has been laid you can start with the top layer of grout. Use a plaster spatula to shovel grout onto the tiled surface. Spread the grout across the tiles using a padded grout trowel. This will press the grout into the tile seams without damaging the tiles themselves. Spread the grout until all of the seams have been completely filled. Wipe away the excess grout with your trowel. Use a damp sponge to clean the tiles completely so there is not grit or haze left on top. This may take several go-rounds and plenty of clean water. Rinse your sponge as it fills with grit to avoid dulling the tiles.
Allow your grout sufficient time to dry before moving on with the waterproofing process. Refer to the grout manufacturer’s instructions for the appropriate wait time.
With the grout completely dry start the waterproofing process by reading the instructions on your chosen tile sealant. Some are spray-on, others require a sponge. Apply one to two coats for ceramic tile and two to three for natural stone.
Ron Hazelton’s House Calls: How to Tile a Kitchen Countertop
Family Handyman:Installing Tile Countertops
This Old House: How to Install a Tile Backsplash
