Dating back to the 1900s, sock monkeys have long been a traditional childhood favorite. They can cost up to $200 for a large one if you buy them from a store, but you can handcraft your own personalized sock monkey at home for under $10.
How to Make a Sock Monkey: Materials
-One pair of heel socks – any socks with a colored heel and toe, look for crazy socks if you want a more interesting monkey
-Cotton batting for stuffing
-Ribbon
-Fabric pen or a marker
-Needle and thread
-Scissors
-Ruler
-2 Buttons or 2 1/2″ googly eyes
-Embroidery thread
-Sewing machine
-Fabric glue – only needed if you will be applying googly eyes instead of sewing them on
-This sock monkey pattern image to use as reference, the directions can be a bit confusing at times.
How to Make a Sock Monkey: Estimated Allotted Time
Allow yourself at least 2-3 hours the first time you try this project. You might want to space your work out over a couple of days. The first time I tried it I started to get a little tired and annoyed about half way through it.
How to Make Sock Monkeys: Instructions
Body and Legs
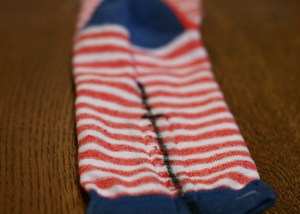
1. Turn sock 1 inside out.
2. Lay the sock down so the opening is towards you and the heel is facing up.
3. Draw a vertical line down the center of the sock starting 1 1/2″ inches below the colored part of the heel towards yourself and the opening of the sock.
4. Starting 1 1/2″ down from the top of the line, stitch a seam 1/4″ out from the left side of the line towards you curving it to the outer edge of the sock at the bottom to make a foot. Repeat on the other side of the line.
5. Cut the sock along the line that you drew in step 3.
6. Turn the sock right side out so the seams are on the inside.
7. Stuff the body, head, and legs through the opening of the crotch. Do not under stuff your monkey or it will look lumpy.
8. Whip stitch the seam closed.
For the remaining body parts, you should draw them onto the sock to ensure they will fit before cutting.
Tail
1. Turn the second sock inside out.
2. Lay the sock on its side so the heel and toe are parallel to your stomach.
3. Cut the colored toe off. This will be used as the monkey’s hat or will be leftover scrap if you choose not to use the hat.
4. Mark a line from the opening at the ankle to the opening at the toe that is 1″ from the top of the sock all the way from one opening to the other.
5. Make another line with a 1/4″ seam allowance below the line from step 12, but this time make it from the opening at the ankle to just above the colored heel.
6. Sew a seam down the line curving at one end like you did with the legs.
7. Cut between the two seams.
8. Turn the tail right side out.
9. Fill it full of stuffing.
10. Whip stitch the tail onto sock one just above the colored heel.
Arms
1. Cut the remaining part of the sock off just above the heel.
2. Draw a vertical line all the way down the center of this piece.
3. Stitch two seams 1/4″ in from each side of the vertical line curving them to the edge at one end to make hands.
4. Cut between the seams.
5. Turn them right side out.
6. Fill with stuffing.
7. Whip stitch the arms onto sock one.
Head
1. Wrap embroidery thread around the first sock just above the arms to make a neck.
2. Cut the colored heel off of sock two.
3. Whip stitch the heel 3/4 of the way to the face of sock one turning the edges in.
4. Fill with stuffing.
5. Whip stitch closed.
6. Sew on button eyes or use fabric glue to attach googly eyes.
7. Using what is left from the foot of sock two cut out four half circles, these will be the ears.
8. Sew two of the half circles together inside out most of the way.
9. Fill with stuffing.
10. Sew the rest of the way up
11. Repeat steps 8-10 from this section for the remaining two half circles.
12. Whip stitch the ears to your sock monkey.
Optional Steps:
1. Use embroidery thread to sew a mouth onto your sock monkey.
2. Take the toe that you cut off of the second sock for a hat. Turn up the outer edges to create a brim.
