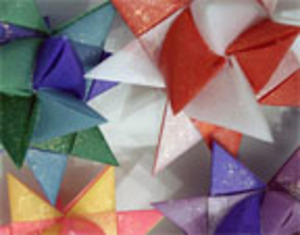
The Froebel star is a favorite in wax paper German ornaments. The design was developed by Friedrich Froebel in the early 1800s. Froebel, who introduced the concept of “kindergarten,” designed the star as a way to teach children to fold paper. The star eventually became one of Germany’s Christmas ornament traditions. Typically, a Froebel star is dipped in paraffin wax and decorated with glitter.
Things You’ll Need:
1/2-inch ribbon
Scissors
Paraffin wax
Pan
Glitter
Thread
Instructions:
Step 1 – Cut 4 pieces of 1/2 inch ribbon 17 inches long. Fold each piece in half the long way so they now measure 8 1/2 inches long. Cut the ends to represent an upside down “V” with the cut being approximately 3/4 inches long.
Step 2 -Make a basket weave with the 4 folded strips. Place each folded strip so one strip is pointing up, down, and to both sides. All four strips will point a different direction and form a plus mark. Insert the end of one strip into the middle of the fold on the closest strip. There is no specific order here. Repeat with the other three strips. Pull all the ends through so the center folds become an interlocking square. Lay the interlocking square down so there is one point going up, down and to each side.
Step 3 -Fold the top layer of the top point down and over the interlocking square to form two points on the bottom. Fold the top layer of the point to the left over the interlocking square. Fold the top layer of the bottom point up and over the interlocking square. Fold the top layer of the right point to the left over the interlocking square and weave the tip of this point through the interlocking square to secure and form a basket weave. Now there will be 2 points going each direction.
Step 4 – Fold the left bottom strip under itself and even with the bottom of the interlocking square at a 90 degree angle. It will form a triangle with the point of the ribbon facing left. Continue with this same strip and fold a 90 degree angle over the top of the two strips pointing to the left. The end of the strip will now be pointing to the top. A triangle will be formed with the two separate folds. Fold the strip pointing up toward the center of the interlocking square. A small triangle point will form at the bottom of the square. Weave the end of the ribbon through the bottom square of the interlocking middle square to hold the point in place.
Step 5 -Turn the star 90 degrees clockwise. Repeat the folds until four points appear on the interlocking square.
Step 6 -Turn the star over so the work that was just completed is lying on the table. Begin at the bottom point and fold in the same manner until the back four points are complete.
Step 7 -Fold the outside bottom strip over the top of itself to form a 90 degree angle. A small triangle will form. Bend the small triangle to up to stand on it’s edge. Bring the tip of this strip towards you and then weave the end of the strip through the bottom right hand corner square on the interlocking square. Pull through snugly so the triangle continues to stand with the flat side pointing in and the loop side pointing towards the outside of the star.
Step 8 -Turn the square 90 degrees. Fold the outside bottom strip over the top of itself to form a 90 degree angle. A small triangle will form. Bend the small triangle to up to stand on it’s edge. Bring the tip of this strip towards you and then weave the end of the strip through the bottom right hand corner square on the interlocking square. Pull through snugly so the triangle continues to stand with the flat side pointing in and the loop side pointing towards the outside of the star.
Step 9 – Turn the square over so the points that were just completed are on the back of the star. Fold the outside bottom strip over the top of itself to form a 90 degree angle. A small triangle will form. Bend the small triangle to up to stand on it’s edge. Bring the tip of this strip towards you and then weave the end of the strip through the bottom right hand corner square on the interlocking square. Pull through snugly so the triangle continues to stand with the flat side pointing in and the loop side pointing towards the outside of the star.
Step 10 – String a 4 inch piece of thread through one of the star loops. Double the thread and tie a knot in the end. Dip the finished star in melted paraffin wax and sprinkle with glitter. Hold approximately 30 seconds until paraffin wax is dry.
Tips:
An alternative to melted paraffin wax is using melted crayons.
The German Star can be made with strips of paper rather than ribbon.
Any width paper strip or ribbon will work for this project. The wider the width – the longer the length.
Warnings:
Be careful when dipping the paper German Star in melted paraffin wax or crayons. Supervision for children is needed with this process.
References:
Craft Ideas: How to Make a German Paper Star – “Froebel Stern
How to Make Stars by Nagle Designs
ulib.iupui.edu: How to Make a German Christmas Star
High Hopes: 3-D Stars (Moravian Pennsylvanian German)
Reference:
- www.associatedcontent.com/article/442583/3d_star_ornament_craft.html?cat=30
- www.associatedcontent.com/article/467165/christmas_craft_how_to_make_a_stand.html?cat
- www.associatedcontent.com/article/70123/christmas_crafts_for_kids.html?cat=24
