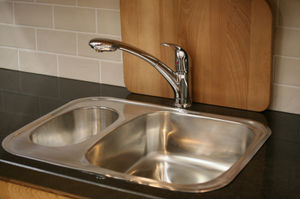
The kitchen sink is the heart of the kitchen. It revolves around our food. We use it to prepare food for cooking and washing meats or vegetables. We use it to clean up our dishes, pots and pans after each meal. We wash our hands in it to clean off the dirt from the garden. Most importantly we also use it to get the most life-sustaining ingredient for human’s survival: water.
Get the right stuff. It may sound cliche, but you need to buy the right sink and faucet before you begin even thinking about turning a wrench. Measure the old sink so you get the right size. You will also want to check the depth of the sink as well as the length and width. If you plan on getting a deep basin, check first for plumbing or cabinet obstructions that may hinder your newly bought sink from fitting correctly. Not only should you be sure the new sink you bought fits in the counter top correctly, you also need to make sure that the faucet you buy fit’s the sink correctly! I’ve seen it happen countless times. Check with the sales clerk at your local home improvement center or plumbing supply store for details on which faucets work with what sinks. Don’t forget the tools and plumbers putty!
Now that you have the right sink for the cabinet, the right faucet for the sink that fit’s the right cabinet, (whew!) you’re ready to begin. Once the old sink is removed, you will need to clean the surface very well with either soap and water or a cleaning agent. If you use a cleaning agent, use soap and water to clean off any residue from the cleaning agents. They may cause the putty under your sink to corrode over time.
First, install the new faucet to the sink. Read the instructions carefully. The manufacturer’s specifications must be followed to a tee. If you don’t and the faucet fails later on, you may void the warranty and be held liable for replacing it. A good way to ruin your day is to scratch your new sink with a wrench or on the work surface itself. Lie a thick towel down on a sturdy surface for a workbench. Use duct tape to wrap around your pliers and other gripping tools you will use around your new faucet. This will help to prevent scratch metal against metal.
Install the new strainer into the sink. Squeeze out some plumbers putty around the inside edge of the strainer. Wrap it around with your fingers into a continuous coil. Attach any gaskets according to the directions and tighten the strainer to the sink using a pair of needle nose pliers. A lot of putty should be squeezed out from the edges of the drainer. This is ok. Once the strainer is tight, remove any excess putty with a cloth. Before you begin the next step, test fit the sink in the countertop to make sure it fits correctly.
Now you need to seal your sink to the countertop. Apply a continuous bead of plumbers putty about ½ inch around the lip of the sink. You can also use silicone caulk, but it can be very messy for beginners. You can apply the silicone directly to the countertop if you plan to use silicone. This will help you from getting your hands sticky with caulk.
Place the sink in the countertop. Crawl underneath the sink and tighten one corner with the provided clips and a Phillips head screwdriver. Make sure the sink is still centered properly and tighten one clip at a time until each corner is square and the sink is centered. Wipe away any excess plumbers putty or silicone.
Reconnect the water lines and drain lines. Before your turn on the water, remove the sinks aerator screen from the faucet. This will prevent any debris or rust from the water lines and clog up your new faucet. Turn the water supply valve on and test your new sink. Let it run for 5 minutes and test for any leaks. Use a towel to dry any areas where water spilled from the pipes. If any new water shows, it is a leak and needs to be refitted. Once you are sure it has no leaks and the impurities have left the water supply line, reattach the aerator screen. Enjoy your new sink!
