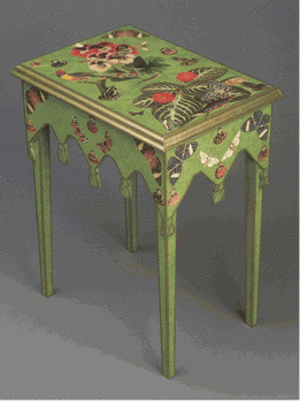
Decoupage has been used since the 17th century as an inexpensive way to recreate the look of a hand-painted piece of furniture with much less time and expense. Decoupage requires cutting images and using glue to apply cutouts to the furniture surface. The cutouts are covered with layers of varnish, lacquer or decoupage glue. The finished result is hard to distinguish from a hand-painted piece of furniture.
Many years ago, original decoupage furniture was created using hand-colored engravings of original artwork. Available now at craft stores are papers created just for using for decoupage. There are a large variety of styles to choose from, including Victorian floral, fruits and antique postcards or photos. There are specific styles of decoupage papers available that are intended to look as if they were created with brush strokes. These will work best when trying to achieve a hand-painted look.
The cutouts themselves will lend to the hand-painted look, but adding a few painted details will really enhance the look. An example of this would be painting trailing vines, tendrils and stems to the floral or fruit decoupage. Paint on highlights and shadows to soften the edges of the paper decoupage or add stippled effects with the end of a paintbrush. Painting the edges of a table in a contrasting color is another example. Using these techniques will help the furniture appear to be hand-painted by a skilled decorative painter.
Although there are many decoupage designs available in craft stores, any paper can be substituted and glued onto furniture and accessories. Magazine images or wrapping paper will work also. Any paper can be used, but consider the thickness of the paper. A thick paper’s edges will be raised higher. However, using several layers of decoupage glue or varnish will help level the furniture surface.
After the paper has been chosen, cut the images precisely with a sharp pair of scissors. Small detailed images may need to be cut with a craft knife. If using a floral design for the decoupage, decide which parts of the image to paint on the furniture. Small leaves and trailing tendrils can be cut off the paper and added on with paint for a more realistic look. Do any preparation work that the furniture might need before starting the decoupage process. If it has just been painted, allow plenty of drying time.
Foam brushes do a good job of applying the decoupage glue, and this type is especially easy on delicate paper. To adhere the paper to the furniture, spread the matte decoupage glue to the back of the cutout paper. Place the cutout sticky side down on the furniture and smooth it out. If the paper is small, then use your fingertips to smooth it. A small roller can also be used.
A large cutout can be applied much the same way as wallpaper. Apply decoupage medium to a section of the cutout and place it on the furniture surface. Then apply more decoupage glue to next section and continue this process smoothing the paper as it’s placed on the furniture. A brayer or roller can be used to smooth the paper and remove any air bubbles. A piece of waxed paper can be placed on the cutout to protect it if necessary while smoothing it down.
Continue applying all of the decoupage cutouts to the furniture surface. Allow plenty of drying time. Now is the time to add any hand-painted touches to the furniture piece, depending on the design. Adding vines and leaves will add character, while giving the piece the much sought after hand-painted appearance. Just be sure to match the paints as close as possible to the decoupage paper. Even if the design being used is not a floral, ragging on a glazing medium can add depth.
Allow the hand-painted accents to dry thoroughly. The final step will be applying several layers of the decoupage medium or water-based varnish for durability. This will also protect the decoupage paper and the paint. Usually two coats of the decoupage glue will be adequate, allowing each coat to dry completely. If the edges of the paper can still be felt, then more coats should be added. The end result should be smooth enough for the paper to be undetectable.
While decoupage glue can also be used to seal the paper and paint, it’s best to use a non-yellowing varnish for the final coat. The decoupage glue can work well on items that will be used only for decorative purposes, as it is not quite as durable as varnish. Furniture that will endure a lot of wear and tear will last longer with varnish protecting the surface.
