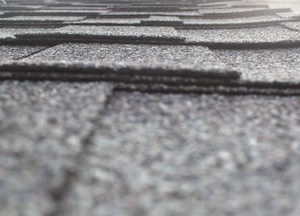
Asphalt shingles are most common roofing product on the market today. With their ease of installation, cheap costs and ability to last, it’s no wonder why asphalt shingles are used in so many roofing applications.
So what is an asphalt shingle? It is a reinforced felt (both organic and synthetic) or fiberglass mat substructure that is covered with liquid asphalt and coated with mineral granules and dried. As the shingle dries, color coating is applied and layers of tar are placed along the tab edge and backside of the bottom tabs to allow other shingles to stick to each other once they are installed.
Installing shingles can become a nightmare if you don’t follow these simple steps. With this basic outline and a little sweat equity, you can install your own shingles in five easy steps.
Under-layment, Flashing and Drip-edge Apply and under-layment of organic felt before beginning the drip-edge installation and flashing. Apply tar in the valleys and underneath any other areas where flashing is to be applied. Attach the flashing using roofing nails about every 6 inches. Leave the bottom two feet unattached to allow the drip-edge to run underneath. Attach the drip-edge with each piece overlapping the other at least two inches and nail every six inches.
Starter Strips and Bull A starter row is the first layer of shingles on the bottom row along the edge of your roof. It is placed to allow the first row of shingles to attach themselves to the starter row. A starter shingle has a bead of tar along the bottom edge that is used to “glue” the first row of shingles down, creating a tight seal that prevents curling due to heat and wind.
First spread a thin two inch band of bull (tar) along the drip edge. Attach starter strips using six roofing nails per shingle. Work your way across the roof edge until you reach the edge or hip/valley.
Layout If you’re running gable to gable with older three tab shingles, you’ll need to snap a square line first. Make a center point and measure along the roof six feet from that point. Now from the center point measure up the roof eight feet. Connect the two points at ten feet and make a mark. Snap a line from that mark to the center point for a perfectly square reference line to align tabbed shingles.
Make a horizontal line along the roof by measuring up each end of the roof the same length and making marks, then snapping a reference line between them. It doesn’t matter what measurements you make as long as they are the same. Use the lines for reference as you lay down rows of shingles to ensure a uniform consistent line.
Attaching Shingles Use galvanized roofing nails with either a nail gun or by hand and nail the first row of shingles in place, using six nails per shingle. Start the first shingle either at a gable end, hip/valley or reference line and work your way to the opposite end making a complete row. Work your way up the roof with each row adding flashing for vents and stacks as you go along.
Valleys simple overlap. Continue with the shingle row through the valley without putting any nails in the flashing. After completing one side of the valley all the way up to the roof line, continue the other side in the same way, leaving the whole shingle overlapping the others. Don’t cut it yet; instead, snap a line from bottom to top and cut along the line.
Caps Once you reach the top, it’s time to add the caps. Starting at the bottom of the hip or end of the ridge and attach a single cap. Now go to the top or the other end of the ridge and tack another cap in the center of the ridge. Snap a reference line on the edge of each cap all the way up the ridge. Now attach the caps, overlapping each other all the way up to the top.
Reference:
- sites.google.com/site/helpfulhandymanhints/
- groups.yahoo.com/group/the_helpful_handyman/
- thehelpfulhandyman.blogspot.com/
