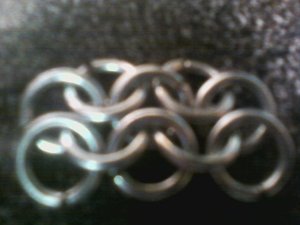
The first thing you must know how to do when starting this project is learn to make a European 4 in 1 weave. It isn’t difficult to learn and should take very little practice to master this weave. Here is a website that has an excellent tutorial: http://www.chainmailbasket.com/euro4in1.php.
Making a chainmail pouch is not only easy it’s a useful project to master. I’ve given away many of these to family and friends as birthday or Christmas presents. They always appreciate the time and effort you put into making such a unique gift. The first thing you need to do is decide on what type of jump rings you want to use. These bags can go through a lot of abuse, so I highly recommend using either galvanized or stainless steel rings. I’ve made bags that also use aluminum rings, but don’t use any aluminum wire size smaller than 16 gauge.
For the sake of this tutorial we are going to use 16 gauge galvanized rings with an inner diameter of ¼ inch. This is a very common ring size and if you don’t have a bunch of rings made up, you should. Now you should begin by chaining 21 rings together using a 1-2-1-2 pattern. This will actually be the depth of your bag when it is finished. Next you will need to begin your weave, from the chain, and make it approximately 39 ½ rows tall. Just to be clear, a row could technically be misconstrued as two rows. The picture on this page is one of two full rows. Sadly, I can’t tell you exactly how long to make your sheet. This will depend on what you plan to use as a “mold”. However, 39 ½ should wrap around a common soda can. After your sheet is complete you need to join one end to the other, making a loop. Make sure it fits around your mold or you’ll have a difficult time with the next step.
Now you need to do what are called compression rings. On the bottom of your mold you will need to take one ring and connect it to two rings. The next needs to go through three rings. Make sure that the rings you are adding “overlap” with the previous one you attached. Continue this 2-3-2-3 pattern until you reach your starting point. If your pattern doesn’t come out exactly even, that’s fine. Just do whatever is next in the pattern to complete row. Now all you have to do is jump up to the next row and start over. Continue this pattern until you reach the middle and are unable to do anymore rows. You should have a very little hole left in the middle. Simply attach one jump ring to half of them, another to the other half.
There are several ways that you can attach your string to close the bag, but I find this one to be the best. Go around the top of the bag and attach a jump ring to every two rings. Unlike the bottom, these rings will not overlap. After you have completed this simply attach one ring to two of the rings on the previous row. Do this all the way around the pouch, this should give you about ten rings sticking up. Find some relatively strong string, or leather strapping, and cut two lengths approximately one foot long. Run one of them all through these rings until you reach the ring you started looping through. Tie the ends together. Next you need to count the rings and figure out which side is opposite of your first knot. Start at the gap by the knot and run the string through half of the rings. Take the other end of the string and put it through the other half of the rings. Now tie the ends together. You now have your first sinching chainmail pouch.
