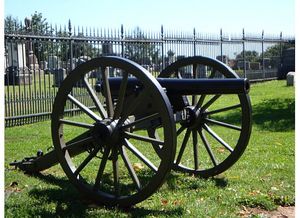
Since the 1600’s gunsmiths have created cannons from bronze in both the United States and in Europe. One of the most famous cannons in the US is the bronze Model 1851 12 pound Napoleon. Now with the use of a little guidance and some everyday materials you can cast a bronze model cannon for yourself. Then you will be able to have a replica piece of history that you can have as a conversational piece in your home or office.
There are a few things you’ll need to do this project. You need a small saucepan, a 1 inch diameter by 6 inch long wood dowel, a pocket knife, and some one part epoxy putty for the first set of things. You will need some bronze casting material, a photograph of a cannon you desire to pattern your model from, some cooking spray, and a stove as the second group of things. The final things you will need are a C clamp and a set of tin snips. When you have gathered these materials you can begin the project.
For step 1, examine the photograph of the cannon that you have selected to pattern your model after. Then use the pocket knife to carve the 1 inch diameter by 6 inch long wood dowel into the shape of the cannon in the photograph that you have selected. This gives you a model for the mold to form around.
Now as step 2, break the one part epoxy putty into two pieces. Then mix one piece of the one part epoxy putty in your hands until it begins to give off heat. At this point it’s ready to use to create the mold for the bronze casting. Now spray the wood cannon model created in step 1 with cooking spray in order to keep the epoxy putty from sticking to it. Then use your hands to shape the epoxy putty around the bottom half of the cannon model in order to create the bottom half of the mold for the bronze casting.
For your third step, mix the second piece of the one part epoxy putty in your hands until it begins to give off heat. At this point it’s ready to use to create the mold for the bronze casting. Now use your hands to shape the epoxy putty around the top half of the cannon model in order to create the top half of the mold for the bronze casting. Be sure to make a hole in the epoxy putty that goes through to the cannon model. This will be the pouring hole for the casting material. Allow about 24 hours for the epoxy of the top and bottom halves of the mold to harden and create the mold. At this point remove the wood dowel model from the mold.
The fourth step is to spray cooking spray into the two halves of the cannon mold. Then use the C clamp to hold the two halves of the cannon mold together and prepare the mold for casting. Now melt the bronze casting material in the small saucepan on the stove. This will be the casting material used to create the bronze model cannon. Now pour the bronze casting material through the open hole in the mold that was created in the last step. Make sure that the mold is completely filled with the bronze casting material. Allow about 24 hours for the bronze casting material to fully set before removing the bronze model cannon from the mold.
The final step is to remove the bronze model cannon from the mold. Use the tin snips to cut away any unwanted pieces from the bronze model cannon. The bronze model cannon is now completed.
Sources
Kalimex: Technical Information on Quick Steel Steel Reinforced Epoxy Putty
Naval Ordnance: Gun-founding in the Late XVIIIth Century
Mel Fisher Maritime Heritage Society Cannon Survey: Cast Guns – Gun-founding in Bronze or Iron
