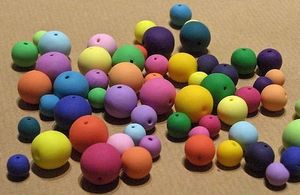
Children often mimic what they see adults doing, thus, if you or someone your child knows wears or makes clay bead jewelry, chances are they will want to do the same. Learning how to make clay bead jewelry is actually a very simple crafts for kids to do by themselves, or with the supervision of an adult. Here you can learn the materials needed to make jewelry for kids made of clay beads, and how to put them together very simply.
While many adults make clay beads from polymer clay, which requires baking, this may prove to be a bit too involved for children, so we will be using an air-drying polymer clay instead. Obviously, the clay beads made from this type of clay will not last as long, or hold up as well as the polymer clay beads, but they will be easier for children to work with.
To make clay bead jewelry for kids, you’ll need the following supplies:
Polymer air-drying clay (color(s) of your choice)
Round toothpicks
Darning needle
Twine or nylon thread
Acrylic paint
Paintbrush
NOTE – All of the supplies listed above can be purchased at your local craft store. The clay can be purchased in a variety of colors or in translucent, which will allow it to be painted the color of your choice.
How to make clay bead jewelry for kids:
STEP 1 – Begin by rolling out the dough into small snake-like logs ( roughly 1″ thick). If you will be making clay beads with more than one color, choose the colors you’d like to use and roll a section for each color. Cut each section into approximately 1″ lengths.
STEP 2 – Now that the cutting has been done, the children can help roll each section into a ball. If you want to have very small beads, roll just one section. If you want medium-size beads, roll two sections together. Larger beads require three sections rolled into one ball. (If you are making clay bead jewelry with multiple colors, combine all the colors together to form one ball)
STEP 3 – Push a toothpick through each clay bead. It may be necessary to wiggle or turn the toothpick while inserting it, to form a clean line all the way through the bead. Remove the toothpick and push it back through, this time leaving it in place.
STEP 4 – Allow the clay beads to set (with the toothpick in place) overnight. This will give them plenty of time to air dry and harden to create jewelry for kids to be able to wear.
STEP 5 – Remove the toothpicks from the clay beads. Now you’ll have a hollow center that you can thread with nylon thread or twine.
STEP 6 (Optional) – If your child wants to personalize their clay bead jewelry one step further, they can paint it using acrylic paints. Designs can be drawn on each bead, or the entire clay bead itself can be painted.
STEP 7 – Use a darning needle to thread the clay beads together. Depending on how many clay beads you made, you can make either a bracelet or a necklace that your child can wear. Jewelry for kids will, obviously, not be the same size as jewelry for adults, so pre-measure your child to see how long to make each piece.
STEP 8 – Once the jewelry is threaded, tie off the ends into a knot to hold it in place.
Related work from Jennifer Wagner:
Beaded Mirror Craft Project
No-Sew Scented Sachet Craft Project
Memory Box Craft Project
SOURCE:
Personal knowledge and experience
