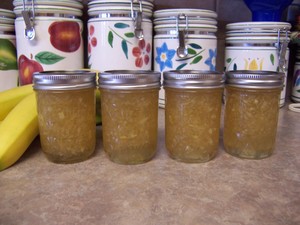
Harvesting your own fruit and then canning it into a variety of jams, jellies, whole or halved fruit slices or marmalades is just too much fun and you will end up enjoying your efforts well into the winter. There is nothing much better than hot toast with sweet tasting homemade pear jam on a cold winter morning in front of a roaring fire.
This canning recipe is really quite simple. The process takes some time, depending on how much you are going to make, because you will have to prepare the pears. This includes peeling, coring and finely dicing the pears so that they are spreadable as very small pieces.
Follow this recipe exactly for the best results. Make sure you use a liquid pectin, as it works much better than a powdered pectin (in fact, powdered may not gel the jam at all). You are certainly allowed to cut back on the quantity of sugar, but don’t cut back too far as this will affect the overall quantity of the recipe.
Make sure you use the freshest pears just harvested from your own trees or ask your produce provider for the freshest batch of pears he has available.
To make 8 pints use the following ingredients:
2 quarts of minced (finely diced) pears. You must peel and core them first.
½.
2 pouches of liquid pectin.
Peel and core pears into a large plastic bowl. Sprinkle some sort of fruit freshener onto the pears to keep them from turning brown. You can use a powder or you can liquefy it. Follow the instructions on the container.
Once you’ve finished mincing your pears, you can put all of the ingredients (except the pectin) into a large pot and bring it to a boil, stirring constantly. Make sure that the sugar dissolves completely.
Add the pectin and stir it in, bringing the mixture back to a rapid boil. Cover and boil for one full minute. Covering the pot at this time is very important so that all sugar on the sides of the pot sweats down back into the mixture. Doing this will help you avoid grainy jam.
If you notice foam on top of your boiled mixture, just skim it off and prepare to can up the jam.
Sterilize your bands, lids and jars. Spoon your hot jam mixture into the hot pint jars. Using a canning funnel makes this step much easier. Fill to ¼ of an inch from the top of the jar. Clean the jar top of any spilled jam and place your lid and band onto the jar. Do not tighten the band too tight on the jar, as air still needs to escape as you process the jam.
Bring your hot water canner up to a rapid boil, with at least two inches of water above the top of the jars in the canner, and then start your timer to cook for 10 minutes. Once finished cooking, remove the jars of jam from the canner and let cool.
You may notice that the fruit can be found more at the top half of the jar than mixed throughout the entire jar. As the jars cool, some of the fruit will drop down in the jar. Once jars are completely cooled down, I rotate the jars to move the fruit around, distributing it evenly throughout each jar. I then place all 8 pints into the refrigerator overnight to set. Remember, this is a jam and it is not necessary to gel solid like a jelly.
Enjoy the jam on your favorite kind of toast, biscuit or muffin.
Source: Steven Coyne’s Kitchen and the “Gardeners Guide” Blog.
