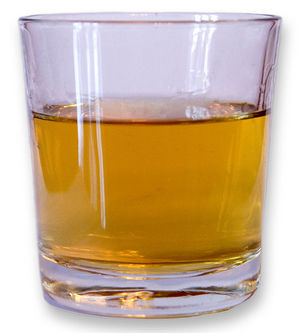
Before getting into how to make homemade whiskey, which might also be spelled whisky, it’s important to think about why you want to make it in the first place. If you’re like me, there are three basic things you want out of a homemade whiskey:
#1. Comparable quality to well known brands such as Jack Daniels.
#2. To make it at a fraction of the cost of store bought whiskey.
#3. Bragging rights and satisfaction that you made this with your own hands. Seriously, wouldn’t you be impressed by homemade whiskey that was as good as store quality?
Now when we think of people making whisky at home, it usually conjures up images of stills carefully hidden in barns and car trunks filled with bottles of whisky along side mason jars filled with moonshine. Unfortunately distillation is the part that can get you into trouble. Indeed there is no law prohibiting people from making whiskey or any other liquor for that matter, there is simply a law prohibiting you from distilling alcohol without approval from the Bureau of Alcohol, Tobacco and Firearms and paying a distillation tax. We will get around this law by changing one type of spirit into another.
Hopefully you’re still interested in the idea because you #1 make higher quality whiskey than store bought brands, #2 make it at a fraction of the cost of store bought whisky and #3 you’re still going to have to have converted something almost undrinkable into a quality whiskey.
You’re first step is going to get some neutral grain spirits. Everclear is probably the most well known brand of neutral grain spirit-other brands will work, but you should ensure they are only made from corn, barley, rye, or wheat. Sorry Vodka won’t work very well as the alcohol content is too low and it still has a different flavor since it’s made from potatoes.
Next you need to get some small oak planks or cut oak into thin enough strips that they will through the mouth of a wine bottle and about 2/3 the height of the bottle. We will be aging the whisky with charred oak inside a bottle instead of aging it in an oak barrel. When I do this I buy white oak trim boards from Lowes or Home Depot that just barely fit into the mouth of a wine bottle. Other woods will work, but will have a different flavor than traditional whiskey. If you do use other woods, make absolutely certain they aren’t treated. This is not a problem for white oak since it isn’t ever sold treated, but other woods such as pine often are.
Then you need to toast your oak planks. It suffices to wrap them in aluminum foil and put them in the oven for four hours. For an oaky flavor, toast at 250 F. For sweet aromatic flavor toast at 300 F. Vanilla notes peak at around 400 F while going up to 420 or 440 F will give a toasty taste. Almond taste peaks at 520 F, but much higher than that starts to taste terribly bitter. For a traditional whiskey, like Jack Daniels, I suggest 420 F. Although there won’t really be smoke that you can see, it will smell very very smoky around so you may want to open the windows a little while you do this. By the way, your kitchen will smell like you recently cooked the world’s best barbecue for several days and will make you hungry as hell every time you’re in there.
Now you need to will char and quench the oak planks. I usually just hold one end of the oak plank and burn the other half with a propane torch. Once it’s flaming pretty well, drop it into a bucket of water or spray it with a hose to quickly quench the fire. This will create lots of tiny defects in the char for the whisky to absorb into and out of. Then repeat, charring the other half of the plank. There shouldn’t be any place on the planks which is left uncharred.
Dilute your spirits by mixing one bottle of water with one bottle of Everclear. This will reduce your whiskey to 80 proof (40%) which is typical for whiskies, but you can use less if you want a stronger whiskey. Fill empty wine bottles 3/4 full of the 80 proof mixture and push 2-4 planks into the bottle. Two planks has roughly the same surface area per volume as storing in a large barrel. Adding more planks will give your whiskey a stronger, smoother character such as a “double barrel” whiskey. Be careful however more oak planks will require longer aging time.
Now the really difficult part! Shove a wooden cork into the bottle and set it on it’s side in a cool dark place for a long time. Rotate the bottle 1/4 turn every several weeks. After one month the liquid will be starting to take on the proper color of whiskey. You can taste it, but it will taste like chewing on a charcoal briquette at this point, although it should have a quite nice smell. After 3-4 months it will taste like cheap bottom shelf wisky and still a bit charcoaly-not the best but certainly drinkable. After a year you will have something resembling the quality of Jack Daniels. The taste will not be the same, but the quality will be approaching it. The longer you wait the smoother your whiskey will be.
Have fun and drink responsibly!
