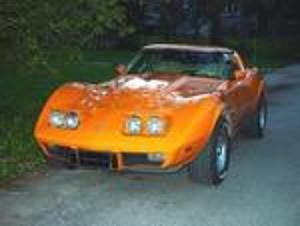
After seemingly endless hours of sanding it seems that you may be reaching an end. Finally, you think to yourself. But, before you quit and start spraying on primer, if you want a truly smooth finish you will need to keep sanding. If you have a large garage or space at home, and the proper tools you can spray on the primer and paint right at home! Here is some helpful information that will help you do the job right, the first time.
If you have not yet started sanding your car now would be the time to start. Even with a power sander it will take you a long time to sand down the body. When using a power sander, be careful not to apply too hard pressure to the surface of the body. If you press too hard it will leave circles in the paint that are hard to get rid of and you may damage the body. If the paint job you are working with is not that bad you do not need to sand all the way down to the metal. If the paint job you are working with is severely damaged you may want to sand completely down to metal just to make sure that there is no further damage, like rust on the body.
After you have sanded every possible inch of the body, you should wash and dry the car to remove the loose grit and dust from the car. The car has to be clean and dry before you can sand on any primer or sealer. Make sure that you rent or buy an air compressor before you start this project, you will need it often. Use the compressor to blow out any water from the door jams, widows, mirrors, seams, and other tiny areas that you cannot reach by hand. The compressed air will force the water to move out so that you can get the car completely dry.
After the car is dry you should begin taping off everything that you don’t want primer on. Take your time and work slowly to make sure that your lines are straight and even on both sides of the car. Cover the windows, lights, seals, wheels, and other parts at the same time. Remove the antenna if you haven’t already and then go over the car again with the compressor in case any water is still hiding in the crevices. Lastly go over the car with a clean, soft cloth after it is dry to remove any remaining dust or grit particles. Now you are ready to begin priming the car.
Spraying on the Primer
When you are shopping for primer make sure that you buy a high fill, high build urethane primer. You can purchase this in gallons at almost any body supply shop or store. Get a gallon of guide coat, and body filler (bondo) or gloss coat too while you are there, and some acetone; you will need it later. If you find that the primer is too thick for your compressor or it is setting quickly, dilute it with some acetone until you achieve the proper texture. The primer should spray on thick, but not clumpy or caked. Clean the spray nozzle with acetone if it becomes plugged. It is not unusual for the primer to be very sticky in hot or humid weather so avoid spraying your car if it is an unbearable day. Generally, any temperature between 65 and 80 degrees Fahrenheit is right for priming.
If you are fairly new to spraying with a compressor practice beforehand on a mock up car or some spare body parts. If you have nothing else work with metal that has been shaped, like tin cans and metal containers. You should work with a long, sweeping motion from side to side 12-16 inches from the surface of the vehicle. When spraying the vehicle try not to spray too much primer in one area. Use an even stroke that covers entire panels with little overlap. Let the car dry overnight before you begin working on the car.
Applying the Guide Coat
Spray on the guide coat in the same manner as the primer, and let dry. The guide coat will make any imperfections show through like bumps or small dents and dings, as well as over paint. Once you have noted the spots that need fixing you are going to start sanding the car, again. Start out with a 320 grit paper to remove the guide coat and even out small bumps. Then switch to a 400 grit paper and sand the guide coat from the entire body of the car. Wet sanding is the best way to get the guide coat off easily but don’t underestimate how long it is going to take to sand the whole car again. It is at least one weekend worth of work.
After you have sanded the car for the second time, wash it and dry it again just as you did before you applied the primer. After the car is completely dry bondo the low spots and fix any other bumps on the surface. If you only have small imperfections you can use polyester fill coat (gloss coat). Because these two products are quite noticeable if done improperly you should reserve using them only on small areas. After the bondo is dry lightly sand down any imperfections. Use a soft, clean cloth to pull away any dust from sanding and if necessary use a damp sponge to remove any remaining dust. Now your car is ready for paint, finally after hours and days, maybe even a full week of elbow grease.
