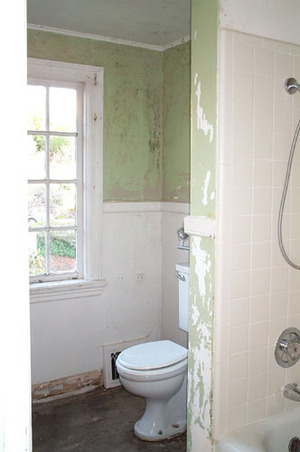
Are you about tired of the olive drab color the last occupants of your home painted the bathroom? Do you think it’s about time to brighten it up and add a little life to the privy? Professional painters may charge between $200 and $300 bucks to give your bathroom a fresh look and they’ll be hanging around your house all day. Why spend the money and sacrifice your privacy? There’s really no reason you can’t do it yourself for the cost of a gallon of paint and a few basic painting tools.
For being one of the smallest, if not the smallest room in your home, the bathroom is one of the most difficult rooms to paint. The reason the bathroom is the most difficult room to paint is because of all the corners and things you have to paint around. Things like toilets (yuk), tubs, shower stalls, mirrors and cabinets all seem to be in the way. This article will tell you how the right tools and the right preparation can make the job go a lot easier.
BUY A TOP QUALITY PAINT. Sherwin-Williams, Porter and Pittsburgh are all fine brands. In bathrooms, kitchens and high moisture areas always use a semi gloss or glossy paint. BUY A TOP QUALITY BRUSH. I recommend a 2 or 2 1/2 inch angle sash brush with the brand name PURDY for cutting in. Buy top of the line material and tools and the job will go easier, look better and last longer. You also want a painter’s 5 in 1 tool, a caulk gun, putty knife and both a standard and Phillips screwdriver. Another wonderful tool for painting bathrooms is a 4″ Whizz Roller for the spaces where a regular roller won’t fit. These tools along with a regular roller should be all you need to complete the job like a professional.
Before you do anything else turn on some music and start singing. Now, get to work!
First of all, preparation is the key to a professional looking paint job. It’s also probably the most time consuming, but preparing the room correctly before you do anything else will save you time and money in the future.
The first part of the preparation is to remove all light and fan fixtures, towel racks, light and outlet switch plates, shower curtain and rod, fuzzy toilet seat covers and anything hanging on the walls. You may need an Allen wrench to remove the towel hangers but nearly everything else should come off with either a standard or Phillips head screwdriver. If you are going to also paint the doors, remove the door knobs and if you think you’ll be able to easily remove the mirror, take it down also. When you remove all of these items, don’t leave them in the bathroom for you to trip over. Put them in another room.
The next thing you want to do (well, you don’t really want to), is to fill the sink with some warm soapy water and scrub down all the walls, especially behind and around the toilet (yuk). If the walls have any buildup (and they do) it may cause problems with the paint not sticking properly.
After you’ve got the walls all clean, you may decide the olive drab color isn’t that bad and go have a nap. If not, the next thing you want to do is make sure all the sealant around the countertops, bathtub and shower stall are in good shape. If there’s any cracking put some toothpaste in the cracks (just joking). Try to dig out any bad sealant using a painter’s tool (a.k.a 5 in 1 tool) and re-caulk where needed using silicon caulk that’s paintable and formulated for kitchens and bathrooms.
While your caulk is setting up, spackle all the nail holes where things like the “Dogs Playing Poker” painting hung. You should be able to sand off any excess spackle after 20 minutes or so.
One final preparation step is to mask anything you don’t want paint on. Cover the floor, counters and bathtub with drop cloths or painter’s plastic and then use 1 inch masking tape to mask around the edges of any fixtures you were unable to remove. Don’t forget the edges of the cabinets, mirror and shower stall. This will make cutting in a lot easier.
Okay, you’re ready to paint. I’ve always preferred painting the trim (if it’s a different color) first and then cutting around all the tight areas with a brush and Whizz Roller. When that’s done you should be able to quickly wrap it up with a regular 9 inch roller.
If you follow these preparation tips, it should be easy to give your bathroom a brand new look and feel with minimal trouble.
