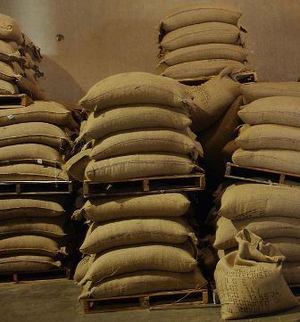
Burlap is a durable fabric that can last a long time, making it a great choice for certain craft or home projects. With a little imagination, burlap bags can be recycled into functional, useful items such as rugs, table runners, and more. Although becoming rare, burlap bags still exist. I have found used burlap bags at grain elevators, feed stores and even online. The following list is just a small sample of the items that can be made with burlap.
NOTE: Always clean your burlap bags before using them in any craft project.
Rug
To make a rug from burlap bags you will need one burlap bag and enough three-inch circles or three inch by one-inch strips of fabric to cover one entire side of the burlap bag. You will also need a pair of scissors, straight pins, and a needle and thread (you can use a sewing machine).
Pin the center of each circle or strip to the burlap bag, covering one entire side. When you are satisfied with your design, sew each fabric piece to the burlap bag. Be sure to sew through both side of the bag. You now have a decorative rug to display on your floor.
Variations: Make and sew fabric yo-yos instead of the circles or strips. If using strips, arrange them in a way, such as a line or on a diagonal, so that you can sew several at one time with a sewing machine. Try smaller or larger circles or strips. Make a rug with a mixture of circles and strips.
Lampshade
This is a simple project requiring only the burlap and an old lampshade. Cut the burlap to fit the lampshade. You can do this by lying the burlap on a flat surface and using a washable marker to trace the sides of the lampshade as you role it along. Then cut out the shape and glue it over the lampshade. Remove the original shade covering if needed.
Decorative table runner
To make a decorative table runner for your kitchen or dining room table you will need one burlap bag, variety of fabric cutouts (your choice), scissors, and craft glue.
Cut the burlap bags down each side and open up on a flat surface. If needed, trim sides and ends to desired width and length. Edges can be hemmed or left frayed. Arrange fabric cutouts on each end and then glue in place.
Variation: Use yo-yo fabric flowers with button centers or silk flowers instead of fabric cutouts.
Colorful bulletin board
For this project, you will need one burlap bag, one bulletin board size piece of cork, drywall, plywood or other type board, fabric dye, various ribbons, craft glue, scissors, staples, staple gun, and a picture hanging kit. First, tie-dye the burlap bag. When it has dried, cut it to the size of the bulletin board with enough to wrap around the back on all sides. Secure this in place on the back with the staples and staple gun. Arrange the ribbons (used to hold cards, pictures and other papers); over the front of the bulletin board (you may want a crisscross or up and down design). Staple these in place on the back. Attach the picture hanging kit to the back and your bulletin board is ready to hang.
Variation: Attach recycled drawer handles and knobs, to the bulletin board to hang and display your jewelry.
Source: Personal Experience
