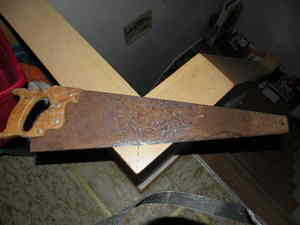
If you are looking for something to do with some of your old rusty tools in the garage, this just might be an idea for you. It has become very popular to paint scenes on old hand saws and hang them on the wall as art. While it might seem all too easy to just paint an old saw, there are a few important steps in the process to ensure that it will turn out nice and last a long while.
I happen to be working on one and have included photos of the work in progress. It really is an easy process and the result is a unique hand made work of art. Here are the steps you will want to follow when you are ready to paint your old hand saw.
Get Rid of the Rust
Depending on the age and condition of the saw you are starting out with, this part of the job may require a bit of elbow grease. All you have to do is get some good steal wool and some inexpensive dish soap and scrub away at the rust under warm running water. You may not be able to get all of it off. That is fine as long as you do try to get any big spots off.
Once you have both sides of your hand saw rust free, lay it on a towel and allow it plenty of time to dry. As soon as it is fully dry you will want to tape off the wooden handle or handles of the saw as to not get any paint or primer on it.
Prime Both Sides of the Hand Saw
You will obviously only see one side of the saw if you plan on hanging it on a wall. I still suggest that you prime or spray paint both sides of the actual hand saw blade. You may want to show off your handy work to someone someday so it is important that the whole saw look nice.
You can use either a primer or just some flat spray paint to coat the blades of the hand saw. I have included photographs of the saw I am working on now showing one side painted and one side freshly washed and dried. You can see that the dried side still has some rust but the painted side looked quite the same and now looks wonderful.
Give both sides of the saw blades plenty of time to dry before attempting painting any scene or decoration on it. You will also want to leave the handles taped off to avoid any paint mistakes on them. I like to use Krylon paint because I just like the finish it leaves. You may want to read more about it here.
Get Creative With Your Painting
Most hand saws that I have seen in shops and flea markets have had very similar scenes painted on them. This is surely an option if you are wanting that specific look for your home. I see the painting as a time to let your creativity flow. Turn this one time hard working saw into a unique art object of your own.
I found many different styles of painted hand saws that are available for purchase by clicking here. You may want to browse through all of the different styles to get ideas for what you might want to do with your own hand saw. While I do suggest this, I suggest even stronger that you use your imagination and playfulness when choosing what to paint on your own saw.
There is nothing but your imagination to set any limits on what you can paint on your saw. You may choose a country scene of some type or you may choose to make it very modern with different shapes and waves of colors. Whatever you do, have fun with this project. Any time you paint, make it your own and from your own imagination.
These hand saws make wonderful gifts and you should not be surprised if you have people asking you to make one for them. The easy way out would be to pass this article along to them and tell them you would love to but you are sure they’ll enjoy making their own even more.
Do be careful while working on this project. Even old saw blades can be very sharp. Sharp rusty objects should be handled with extreme care and caution. If you liked this craft idea, be sure to click here for more of my craft ideas.
Source:
http://www.mountaincrafts.net/category/hand_saws/
http://www.krylon.com/
